Approach to Darwin -
Late on Wednesday 26th as some 500 men of 2 Para moved
south towards Darwin, there was much uncertainty about
Argentine strength in the area. However by the time of the
surrender, and after allowance is made for the nearly 50
killed (not the originally reported 250), there were over
1,000 POW's including the 12th Inf Regt and a Coy from the
25th. With their approaches mined, the infantry were in
well-prepared defensive positions, especially between Boca
House and Darwin half way down the isthmus, and for
support could call on 105mm artillery, AA guns later in
the ground defence role, and attack aircraft from Stanley.
By early Thursday morning
(27th), 2 Para had marched the eight miles from Sussex
Mountains and reached the holding position at Camilla
Creek House where most lay up all day. Two patrols from C
Coy probed forward towards either side of the isthmus to
plot some of the enemy defences, but later pulled back
under fire. And then early that
afternoon, two Harrier GR.3's attacked Argentine positions
with CBU's, and in a subsequent strafing run, one of them
was hit probably by 35mm Oerlikon fire and crashed to the
west of Goose Green [b27]. Sqdn Ldr Iveson ejected and hid
up before being rescued three days later.
That night, the three 105's of
8 Bty RA and their ammo were flown to Camilla Creek House
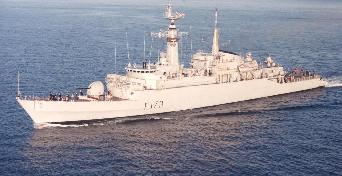
by No.846 Sea Kings, and "Arrow" headed into Grantham
Sound, opening fire from there under the control of a
naval gunfire observer. A later turret fault was repaired
and she remained on station supporting the Paras advance
towards Darwin, when with the threat of air attack at
dawn, had to return to San Carlos Water. Meanwhile that
same evening, 2 Para moved off the two miles to the start
line with C (Patrol) Coy leading the way. With D Coy at
first in reserve, A and B Coy's waited on either side of
Burntside Pond, the mortars to their rear, and the fire
support company with its Milans initially across Camilla
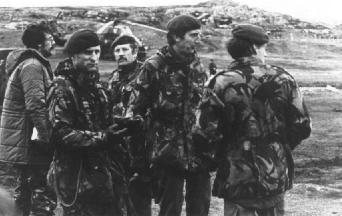
Creek from the forward Argentine positions. Early on
Friday the 28th, the men of 2 Para prepared for a
night attack against largely unknown forces across the
open ground of the Goose Green area, five miles long and
over a mile wide.
The Battle for Darwin
and Goose Green, Friday 28th May - At
3.30 am, A Coy moved off on the left and attacked
Burntside House believed to be occupied by an Argentine
platoon, but found no-one there other than four unhurt
civilians. At 4.10 am, B Coy started
forward from the other side of Burntside Pond down the
right flank with D Coy following them long the middle.
With artillery support on both sides, B and D Coy's were
soon in confused action against a series of enemy
trenches, and as they slowly made progress, A Coy moved
past unoccupied positions at Coronation Point. Leaving one
platoon of A Coy to provide covering fire from the north
side of Darwin, the remainder started to circle round the
inlet to take the settlement. As dawn broke, the attacks
on both flanks bogged down as B Coy came up against the
strongpoint of Boca House and A Coy
found that a small rise, later known as Darwin Hill, was
the key to the Argentine defences.
Not until
midday did 2 Para
break through. As A Coy was hit and went to ground, Lt Col
Jones and his Tac HQ came up, and another attempt to push
forward was made which led to two officers and an NCO
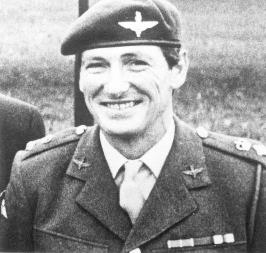
being killed. Col Jones moved off virtually on his own,
and was soon shot and dying in an action which led to the
award of a Victoria Cross. Maj Keeble was called up from
the rear, and leaving A Coy to slowly wrest Darwin Hill
and pulling B Coy slightly back from Boca House, ordered D
Coy to move round them on the far right along the edge of
the sea. Now in daylight, the battle continued with the
Argentines helicoptering in their first reinforcements and
flying more support missions. The first attack by
Falkland's based aircraft took place earlier when a Grupo
3 Pucara was hit, probably by a Blowpipe SAM, but limped
back to Stanley. The next sortie by two more Pucaras
caught two Royal Marine Scouts on their way in to casevac
Lt Col Jones. Capt Niblett managed to evade them, but Lt
Nunn was killed by cannon fire and went down near Camilla
Creek House [b28]. One of the Pucaras
was later found to have crashed into high ground returning
to Stanley [a58].
By midday, A Coy had taken and
held Darwin Hill, and B and
D Coy's had finally
silenced Boca House. Still under fire, D
and
C Coy's headed towards the airfield and Goose Green while
B Coy circled east to cut off the settlement. During the
attack towards the schoolhouse, three men of D Coy were
killed in an incident involving a white flag. Now
into the late afternoon, aircraft from both sides came on
the scene, starting with two MB.339's of CANA 1 Esc and
two Pucaras of Grupo 3 which hit the school area. One of
the Navy jets was brought down by a Royal Marine Blowpipe
[a59], and minutes later one of the Pucaras dropped napalm
and the other shot down by small arms fire [a60]. Then
three Harrier GR.3's brought much needed relief by hitting
the AA guns at Goose Green with CBU's and rockets.
With evening approaching and
the Argentines squeezed in towards Goose Green, more
reinforcements arrived to the south by helicopter, while
to the north, J Coy 42 Cdo was flown in reinforce 2 Para
but too late to join in the fighting. Two Argentine POW's
were sent in to start negotiations which lasted most of
the night, and next morning, Group Capt Pedroza
surrendered all his forces to Maj Keeble. British losses
were fifteen men from 2 Para, a Royal Engineer and the
Marine pilot, and 30 to 40 Paras wounded. Many of the
1,000 Argentine POW's including the FAA men sailed on
"Norland" to Montevideo in early June.