As dawn broke on Monday 14th,
and the Scots Guards completed the capture of Tumbledown,
2 Para on Wireless Ridge saw the Argentines streaming back
to Stanley as the British artillery shelled their
positions at will. The British forces now edged forward.
Under Brigadier Thompson (pictured
below
at an earlier stage in the campaign), 2 Para moved
off along the Stanley road followed later by 3 Para; 42
Cdo shortly flew forward from Mount Harriet and marched
towards Stanley; and 45 Cdo yomped from Two Sisters for
Sapper Hill. By nightfall all of 3 Cdo Bde
was close to the capital. With 5th Infantry,
the Gurkhas were ready to make a daylight attack on Mount
William, but the Argentines disappeared and D Coy moved
onto the summit that morning without any opposition.
Meanwhile the Welsh Guards were delayed by minefields on
their way to Sapper Hill, but then flew in with A and C
Coys 40 Cdo to face slight enemy resistance just as 45 Cdo
showed up.
2 Para was the first unit to reach
the outskirts, but halted as surrender negotiations got
underway. These lasted for much of the day, and as they
proceeded, British forces were ordered not to fire on the
apparently demoralized enemy. However even now, General
Menendez had 8,000 troops in the Stanley area including the
largely intact 3rd, 6th and 25th Inf Regts, still well
supplied with food and small arms ammo, but with little left
for their remaining artillery and with all the high ground
taken. Although ordered by Galtieri that morning to continue
the fight, Menendez decided to negotiate, and a small
British team led by Lt Col Rose of the SAS helicoptered in.
A surrender document covering enemy forces both on West and
East Falkland was agreed at the end of the afternoon, and
that evening, General Moore flew to Stanley for the official
signing.
Timed to take effect from
9.00 pm local time, the actual signing took place at 9.30
pm or half an hour into the 15th, Zulu time. First into
Stanley next morning was 2 Para, followed by 3 Para and 42
Cdo, whose men of J Coy, last there with NP 8901, later
hoisted the Governor's flag over Government House. With 3
Cdo Bde staying in the Stanley area, most of
5th Infantry returned to Fitzroy, although the
Gurkhas went to Goose Green where they later lost a man
killed on battlefield clearance.
With the surrender of the
Argentines around Stanley, and their transfer to the
airfield as a POW camp, steps were taken to deal with the
forces on West Falkland and far away on Southern Thule.
Still on Tuesday 15th, B Coy 40 Cdo crossed over to Port
Howard by ship and helicopter to take the surrender of the
5th Inf Regt, and "Avenger's" Lynx landed a small party at
Fox Bay to deal with the 8th Regt, after which all the
POW's moved to San Carlos. To re-take Southern Thule in
"Operation Keyhole", frigate "Yarmouth" and RFA "Olmeda"
reached South Georgia from the TEZ on Thursday 17th to
pick up men of M Coy 42 Cdo under the command of Capt Nunn
RM, some of whom had already left with "Endurance" and tug
"Salvageman". Arriving off the bleak shores on Saturday,
"Endurance'" Wasp landed a small group near the Argentine
base, and when "Yarmouth" arrived (with "Olmeda") to
provide gunfire support on Sunday 20th June, the tiny
remaining garrison on Southern Thule surrendered without a
shot being fired.
Needing food and shelter for
his own men, a priority for General Moore was to ship home
the POW's, with the exception of around 500 senior
officers and technicians held as a guarantee against the
junta fighting on. Both "Canberra" and "Norland" loaded a
thousand POW's at San Carlos Water before heading for
Stanley. There, "Canberra" took on board a further 3,000,
leaving for Argentine on Friday 18th to be escorted into
Puerto Madryn next day by destroyers "Santisima Trinidad"
and "Comodoro Py". "Norland" sailed from Stanley on Friday
with a total of 2,000 POW's to arrive off the same port
two days later, and many of the remaining Argentines
followed in the icebreaker "Bahia Paraiso". The "specials"
returned on "St Edmund" a month later.
Even with their losses during
the fighting, the Argentines left behind considerable
amounts of war material including artillery and armoured
cars, missile and radar systems, and aircraft and
helicopters in various states of repair, some of which
returned to the UK for evaluation or integration into the
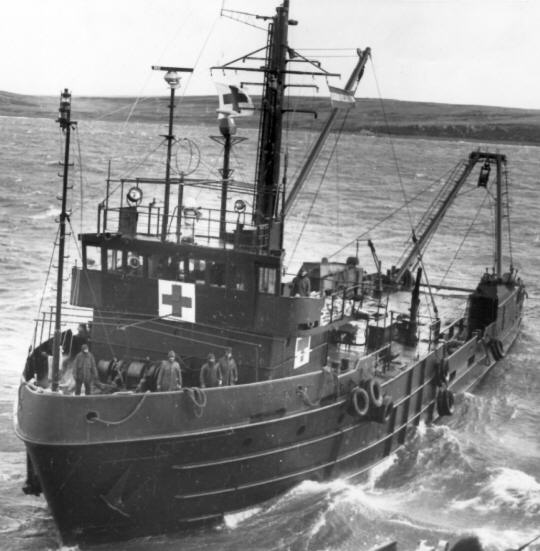
Services. And apart from recovering the two Falkland's
coasters "Forrest" and "Monsunen" for local duties, the
Royal Navy took over two other small craft.
CAPTURED IN STANLEY AREA
Aircraft - 11 FAA Pucaras,
3 CANA Aermacchi MB-339A's
Helicopters - 2 FAA Bell
212's, 1 PNA Puma, 1 Army Chinook, 2 Agusta A-109A's,
and 9 Iroquois UH-1H's
Ships - small oil rig
tender "Yehuin" (renamed "Falkland Sound") and PNA
patrol craft "Islas Malvinas" (manned by men of
destroyer "Cardiff" and renamed "Tiger Bay")
As the Task Force
ships started entering Port William and Stanley Harbour,
the minesweeping trawlers moved in to successfully sweep a
field of contact mines laid off Cape Pembroke. On land,
the situation was far worse as apart from the Army having
to clear all the battlefield litter and discarded
ordnance, the Royal Engineers had to deal with the
extensive and mainly unmarked minefields especially around
Stanley. (There are doubts if the work will ever be
finished.)
As for the islands
themselves, the British Government was committed to their
defence in a policy referred to as "Fortress Falklands".
If large and continuing expenditure and large, permanent
garrisons were to be avoided, rapid reinforcement by air
was vital. A first step came on the 24th June when an
extended range Hercules landed at Stanley airfield. Then
in October, after its lengthening and re-designation as
RAF Stanley, the airport could be used by Phantom
fighters. But that was still not enough. A major airfield
and associated installations were therefore constructed
near Pleasant Peak. Completed in 1985, Mount Pleasant
airport is able to handle wide-bodied, long-range jet
transports capable of reinforcing the Falklands at short
notice.
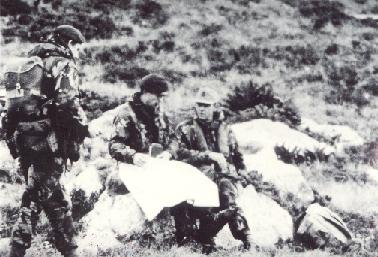
Sitting,
Brigadier
J H Thompson RM commanding officer, 3 Commando
Brigade and Major General Moore, Commander, Land
Forces, Falkland Islands (Courtesy - Royal Marines
Museum)